
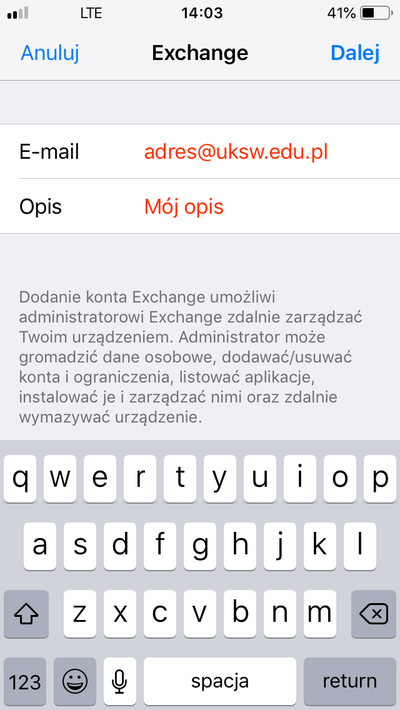
Step 1: Launch the new account wizard
Launch the new account wizard. You will find it in Settings application in the Mail, Contacts, Calendars panel under the Add account wizard:
- create new account,
- select type: Exchange,
- enter base account parameters (e-mail address and account description) and then click Next.
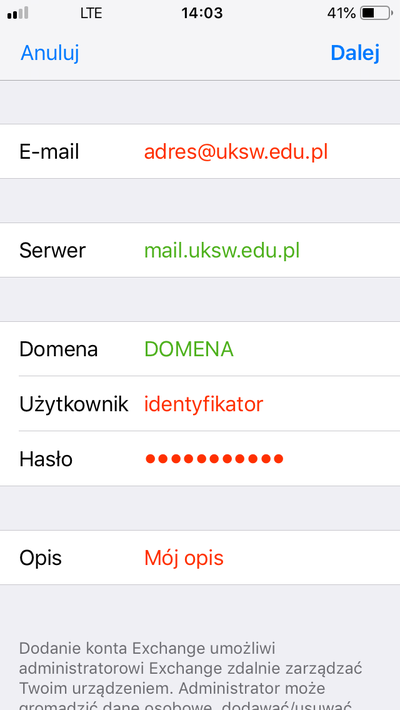
Step 2: Enter server parameters and your credentials
In the next panel choose Advanced/manual configuration and fill out the form:
- green values should be filled exactly as stated,
- red values should be substituted with your data.
| your e-mail address (e.g. n.surname@uksw.edu.pl) | |
| Server | mail.uksw.edu.pl |
| Domain | DOMENA |
| User | your identificator (login, e.g. n.surname or student id number) |
| Description | any value, the field corresponds to the label near your account in app |
Click Next. The wizard will create account and ask few questions about your preferences.